
How to Make a Santa Nice List Certificate: Step by Step (2026)
How to make a Santa Nice List certificate from one child’s photo: every step, name and message ideas, photo tips, and what to check before you share.
Updated Nov 13, 2026
The short answer
Preparing a personalised Santa Nice List certificate takes four studio steps: add one clear portrait of your child, choose Santa Nice List, select the format, then add names or Christmas details. Nice List uses one photo and requires the child’s name. The two-pet switch belongs to Christmas pets; it is not a way to add a second child to this certificate. This guide explains how to prepare the source and review a result; image settings use Nano Banana 2 at 8 credits for 1K or 12 for 2K, and video credits follow the selected Seedance settings. Create your result in the studio, then view and download it from your account.
What’s new on this page
- — Published the step-by-step guide for this effect.
- — Added the matching example and an illustrated walkthrough for each preparation step.
- — Explained the model choices and credit costs.
A Santa Nice List certificate puts your child’s portrait and name into a festive keepsake, with a message about the good things they have done. You do not need a costume, a visit to a studio or a photograph with Santa: the starting point is an ordinary portrait and a name.
This guide walks through the PopFestive studio, then covers costs, timing and photo problems. Each illustrated step follows the current studio settings; the final example belongs to this effect.
What you need: one clear portrait of your child, a phone or computer, and permission to use the photos. For a child’s photo, a parent or guardian must agree.
Step 1: Open the studio and add your photo
The studio is on the homepage. Choose Santa Nice List, tap the upload slot and select one clear portrait of your child from your phone or computer. The phone-upload option is still there; on a computer you can also drag a photo into the slot or use the paste shortcut shown in the studio.
Nice List uses one photo and requires the child’s name. The two-pet switch belongs to Christmas pets; it is not a way to add a second child to this certificate.
Once added, the photo appears in its slot. Remove it to choose another. Check that the face is clear before continuing; a sharp thumbnail does not always mean a suitable full image.
Photo tips that make a real difference:
- Front-facing or close to it, with the whole face visible and no hand, hat brim or object hiding it.
- Good light and a sharp image. An ordinary phone photograph is a useful starting point.
- Check the spelling of the child’s name before you do anything else. Keep a certificate message short and specific: helping a sibling, being kind to friends or trying something new means more than a long list of achievements.
- Avoid heavy filters as a way of repairing the source image; start with a clearer, more natural photo instead.
Step 2: Pick the Christmas effect
Choose what you want to make. Santa Nice List prepares a personalised Santa Nice List certificate; the other three effects are in the same studio. Check the selected card before adding details, so a certificate message does not end up in the profile-picture or pet effect.
Step 3: Choose quality and format, or keep the default
This effect is designed around a vertical certificate. Open the quality and format area to review the available choices, and choose framing for the intended use rather than guessing which model is best. Nano Banana 2 costs 8 credits at 1K or 12 credits at 2K; the default is 2K. You can choose 9:16, 1:1 or 16:9.
Step 4: Add names and Christmas details
In Name & certificate message, write one specific line, such as “Emma — for being kind and helpful”. Santa Nice List requires the child’s name; the other effects can keep the selected style when details are left blank. Avoid stacking several conflicting scenes into one description.
Check the spelling of the child’s name before you do anything else. Keep a certificate message short and specific: helping a sibling, being kind to friends or trying something new means more than a long list of achievements.
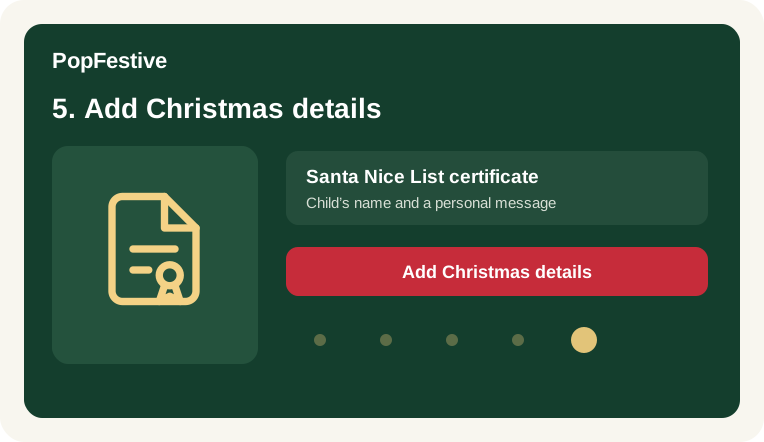
Step 5: Review the settings and prepare to create
Before tapping Create my certificate, check the photo, effect and name. Review the settings and credit amount before creating.
Step 6: Preview, then download
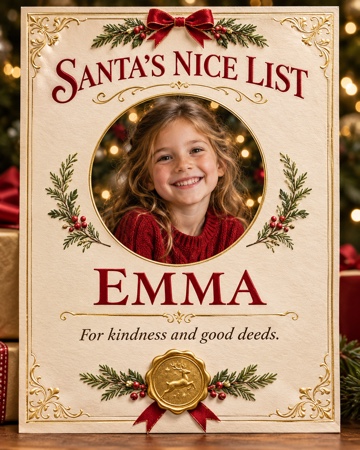
Preview the creation before downloading or sharing. The sample below illustrates the effect; it is not a result made from your uploaded photo. Example people are fictional.
Read the name, certificate heading and message at full size. Decorative lettering can look convincing in a thumbnail while still containing a misspelling. Do not treat a sample certificate as a promise that a model will reproduce every letter correctly.
How much does Santa Nice List cost?
Photos use Nano Banana 2 at 8 credits for 1K or 12 for 2K. Videos follow the existing Seedance model, resolution and length formula. The original credit packs and subscriptions remain available.
Troubleshooting
- The photo is not clear enough. Choose a sharper, well-lit image with the face large enough in the frame instead of adding more descriptive text.
- The subject does not look right. Review the angle and anything hiding the face; for pets, also check coat markings and use a clear photo for each animal.
- The details are wrong. Review the subject, text and framing at full size against the source photo before sharing.
- What if my creation cannot be completed? Check your photo and settings, then try again later. No credits are used when a creation cannot be started.
Keep going
- Want a Christmas profile picture instead? Read How to Make a Christmas PFP: Step by Step (2026).
- Want a baby riding reindeer Christmas video instead? Read How to Make a Baby Riding Reindeer Video: Step by Step (2026).
- Want a Christmas pet portrait instead? Read How to Make Christmas Pet Photos: One or Two Pets, Step by Step (2026).